Author: admin
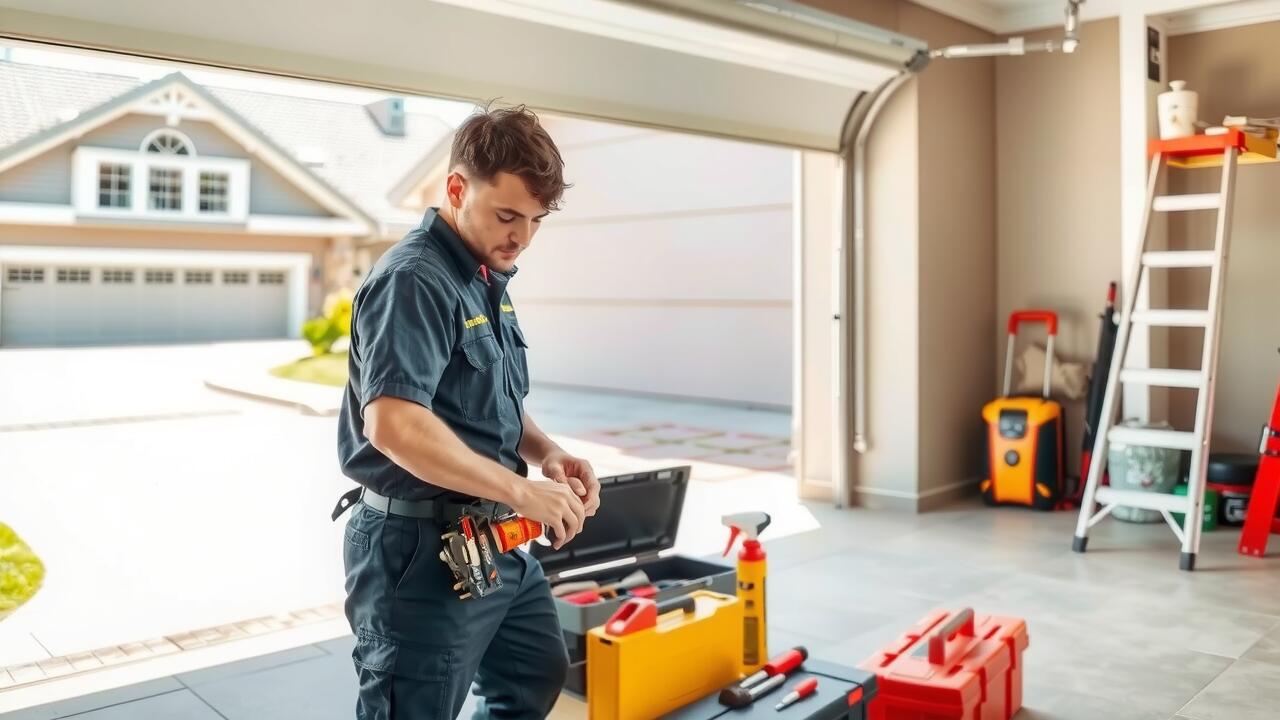
Table Of Contents
Common Issues Addressed During a Tune-Up
A standard garage door tune-up typically addresses several common issues that may affect its performance. Technicians often start by inspecting the door’s balance and alignment, ensuring it opens and closes smoothly. They check the springs, cables, and rollers for wear and tear. Lubrication of moving parts is also a crucial part of the process, as it helps prevent unnecessary friction and reduces the risk of malfunction.
Another key aspect of garage door maintenance and tune-ups involves testing the safety features of the door. The sensors that prevent the door from closing on objects or people require regular testing to ensure they function correctly. Additionally, technicians will examine the remote control operations and any installed keypads to identify potential issues before they become more serious problems. Regular garage door maintenance and tune-ups in this way help extend the life of the door and ensure safe operation for homeowners.
Identifying Potential Problem Areas
When assessing the state of your garage door, it is important to look for common signs of wear and tear. These may include unusual noises during operation, doors that are slow to open or close, and any visible misalignment. Monitoring the condition of the springs, cables, and rollers can help identify areas that may require attention. Engaging in regular Garage Door Maintenance and Tune-Ups in this manner can help preemptively address issues before they escalate into more significant problems.
Additionally, checking the sensors and safety features is essential for ensuring proper functionality. Dirty or misaligned sensors can prevent the door from closing fully, posing safety risks. Look for any damage to the weather stripping, as it plays a crucial role in protecting the garage from the elements. Attention to these potential problem areas during routine inspections contributes to the longevity and efficiency of your garage door system.
Seasonal Considerations for Garage Door Maintenance
Seasonal changes significantly impact the performance of garage doors, making regular maintenance essential. In colder months, lubricants can thicken, causing parts to stiffen. This stiffness can lead to difficulties in opening or closing the door. Warm temperatures can also pose their own challenges, as the heat may cause metal components to expand. Addressing these issues promptly can prevent more costly repairs and ensure smooth operation year-round.
Garage Door Maintenance and Tune-Ups in different seasons can enhance the longevity of the door and its components. Homeowners should pay attention to the impact of humidity on wood doors, which may swell and warp. Ensuring that seals and weather stripping are intact before changes in temperature can protect against moisture damage. Regular inspections tailored to seasonal conditions will allow for timely adjustments and replacements, contributing to optimal functionality.
How Weather Impacts Garage Door Performance
Extreme temperatures can significantly influence the performance of garage doors. In colder climates, lubricants may thicken, making it difficult for components to move smoothly. This can lead to wear and tear, resulting in potentially costly repairs if not addressed in a timely manner. On the other hand, hot weather can cause materials to expand, impacting alignment and functionality.
Garage Door Maintenance and Tune-Ups in various seasons can help mitigate these effects. Regular inspections ensure that parts are in good working order, regardless of the temperature fluctuations. Addressing weather-related issues proactively can prolong the lifespan of the door, enhance safety, and improve overall performance.
How to Choose a Reliable Service Provider
Choosing a reliable service provider for garage door maintenance and tune-ups in your area requires careful consideration. Start by seeking recommendations from friends or family who have previously hired professionals for similar services. Online reviews can also provide valuable insights into a technician’s reputation and reliability. Look for companies with a history of excellent customer service and positive feedback from clients.
It’s essential to verify that the technician is licensed and insured. This protects you in case of accidents or damage during the service. Ask about their experience specifically in garage door maintenance and tune-ups in order to gauge their expertise. A trustworthy provider will also be transparent about pricing and available services, ensuring that you understand what to expect throughout the process.
Key Qualities to Look For in a Technician
When selecting a technician for Garage Door Maintenance and Tune-Ups in your area, experience should be a top priority. A qualified professional should have recognized training and hands-on experience with various garage door systems. This ensures they can identify issues accurately and provide effective solutions. Familiarity with the latest technology and industry standards demonstrates their commitment to quality service.
In addition to experience, reputation plays a crucial role in choosing the right technician. Look for customer reviews and testimonials to gauge the quality of their work and reliability. A technician who communicates well can instill confidence during the process. Transparency about costs and procedures also reflects professionalism, making it less likely for unexpected charges to arise later on.
FAQS
What is included in a garage door tune-up?
A garage door tune-up typically includes inspecting and adjusting the door’s springs, cables, rollers, and tracks, lubricating moving parts, checking the door’s balance, and ensuring safety features are functioning properly.
How often should I have my garage door tuned up?
It is recommended to have your garage door tuned up at least once a year. However, if you use your garage door frequently or if you live in an area with extreme weather conditions, more frequent maintenance may be necessary.
What are the common signs that my garage door needs a tune-up?
Common signs include unusual noises during operation, the door not opening or closing smoothly, misalignment, or if the door seems heavy or difficult to lift.
How much can I expect to pay for a garage door tune-up?
The cost of a garage door tune-up can vary based on location and the service provider, but it generally ranges from $100 to $200.
Can I perform a garage door tune-up myself?
While some basic maintenance tasks can be done by homeowners, such as lubrication and visual inspections, it’s advisable to hire a professional for a comprehensive tune-up to ensure safety and proper functioning.


Table Of Contents
Professional Repair Services
When dealing with a broken garage door cable, seeking professional repair services can ensure safety and proper functionality. Trained technicians possess the necessary tools and expertise to handle complex garage door mechanisms. They can quickly diagnose the issue and provide an effective solution, saving homeowners time and preventing further damage.
For those searching online for assistance, using the phrase “Garage Door Cable Replacement near me” can yield numerous local options. Many companies offer same-day services, which can be particularly beneficial for urgent situations. It’s important to choose a reputable service provider with positive reviews to ensure quality workmanship and long-lasting results.
When to Call in the Experts
If you notice any signs of wear or damage to your garage door cables, it’s time to consider seeking professional help. Cables that are fraying or have become loose can lead to further complications. Signs such as loud noises during operation or the door functioning unevenly indicate that repair may be necessary. Delaying repairs can put additional stress on other components of the garage door system, making the situation worse.
In instances where the cables have completely broken or if the door has fallen, immediate professional assistance is crucial. Attempting to fix broken cables without the proper knowledge can be dangerous. Searching for “Garage Door Cable Replacement near me” can connect you with local experts who understand the nuances of garage door systems. This ensures repairs are handled safely and effectively, restoring functionality to your door without causing further damage.
Maintenance Tips for Garage Door Cables
Regular maintenance of garage door cables can significantly extend their lifespan. Inspecting the cables for signs of wear, fraying, or corrosion should be part of your routine. Keeping the pulleys and rollers clean will help reduce friction, which can lead to cable damage. Additionally, lubricating the cables with a specialized garage door lubricant prevents rust and enhances their performance.
If you notice any issues during your inspections, it’s crucial to address them promptly. Waiting too long may lead to a broken cable, resulting in further complications. Should you find yourself needing immediate assistance, searching for “Garage Door Cable Replacement near me” can provide options for professional help in your area. Regular attention to these components can help avoid unexpected repairs and ensure your garage door operates smoothly.
Proactive Measures to Prevent Breakage
Regular maintenance can significantly extend the lifespan of garage door cables. Inspect the cables frequently for signs of wear and tear, such as fraying or rust. Lubricating the cables can help reduce friction and prevent premature deterioration. Keeping the area around the garage door clean will also minimize the risk of debris getting caught in the mechanism, which can stress the cables over time.
Additionally, investing in quality materials when installing new cables can provide better durability. Consult with professionals for installation, and consider periodic inspections as a part of routine maintenance. If you notice any issues or suspect potential problems, searching for “Garage Door Cable Replacement near me” can connect you with local experts who can assist you before a minor inconvenience turns into a major repair.
Understanding Garage Door Cable Functionality
Garage door cables play a crucial role in the overall functionality of the door system. They work in tandem with the springs to lift and lower the door smoothly. When the door is opened, the cables pull on the drums at the top of the door, allowing it to lift evenly. Conversely, when the door is closed, the cables help to lower it securely. Understanding this mechanism is essential for identifying potential issues.
In the event of a malfunction, recognizing the signs of wear in the cables is vital. Fraying, rust, or visible damage can indicate that a cable is nearing its breaking point. Regular inspections can help catch these problems early. If a cable does break, residents often search for “Garage Door Cable Replacement near me” to find local services that can assist with repairs. Prompt action can prevent further damage to the door and ensure safe operation.
How Cables Work in Door Operation
Garage door cables play a crucial role in the smooth operation of the garage door. They work in tandem with the springs to lift and lower the door, providing the necessary tension to counterbalance the weight of the door. When the opener activates, the cables pull the door upward, allowing it to open easily. In the closing process, the cables help guide the door down safely and steadily, preventing it from slamming shut.
Understanding the mechanics of garage door cables can help homeowners identify potential issues before they escalate. Regular inspections are important to catch signs of wear and tear, such as fraying or corrosion. If a cable breaks, it can lead to serious safety risks. Searching for “Garage Door Cable Replacement near me” can connect you with nearby professionals who can address the problem quickly and efficiently.
FAQS
What are the signs that my garage door cable is broken?
Common signs of a broken garage door cable include the door not opening or closing properly, visible fraying or damage to the cable, and a noticeable imbalance in the door when it is opened or closed.
How can I temporarily secure my garage door if the cable breaks?
If your garage door cable breaks, you can temporarily secure the door by manually locking it and avoiding use until it can be repaired. Make sure to keep the door closed to prevent it from falling or becoming unbalanced.
Is it safe to repair a garage door cable myself?
Repairing a garage door cable can be dangerous due to the tension involved. It is recommended to call a professional for repairs unless you have experience and knowledge in handling garage door systems.
How often should I inspect my garage door cables?
It’s a good practice to inspect your garage door cables at least once a year to check for any signs of wear, fraying, or damage. Regular maintenance can help prevent unexpected breakages.
What can I do to prevent my garage door cables from breaking?
To prevent garage door cables from breaking, ensure regular maintenance, including lubrication of moving parts, checking for rust or corrosion, and addressing any misalignments or issues with the door’s balancing mechanism promptly.
Related Links
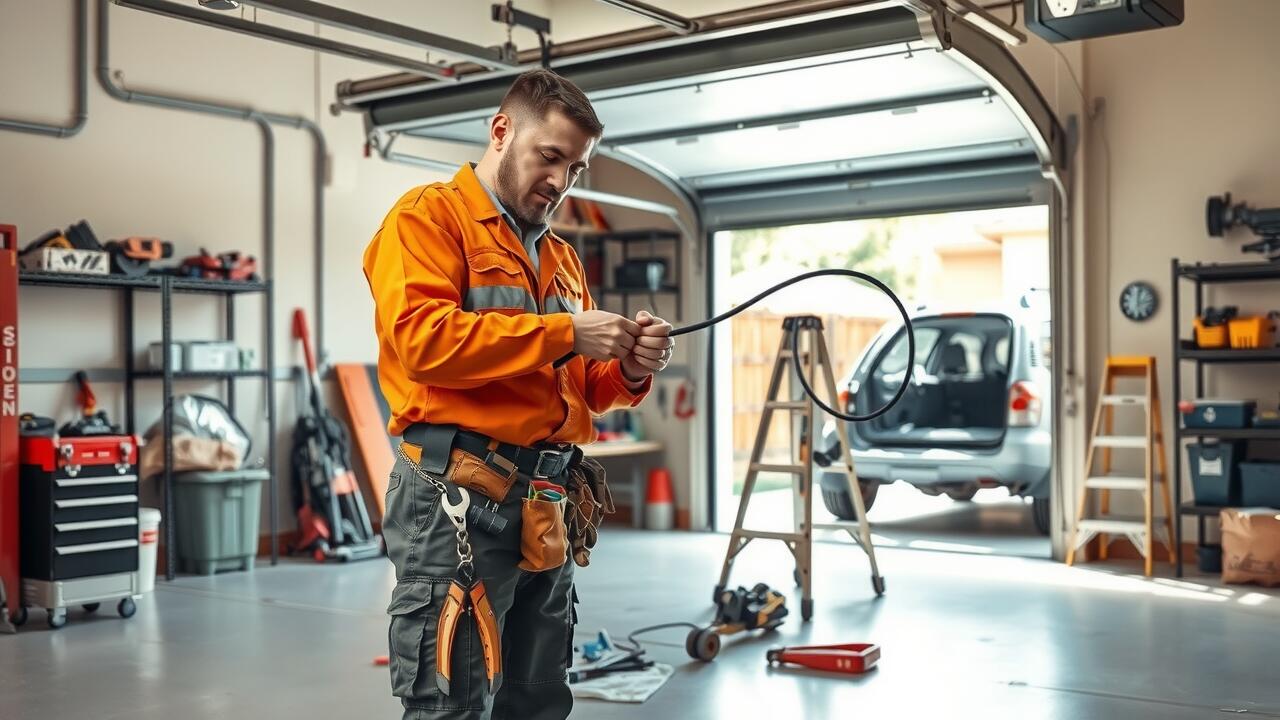

Table Of Contents
Signs Your Garage Door Cables Need Replacement
Garage door cables play a crucial role in the overall function of the door. If you notice that the door is unbalanced or has difficulty moving, this could signify that the cables are wearing out or have sustained damage. An inspection of the cables may reveal fraying, breaks, or rust, indicating that a Garage Door Cable Replacement is necessary to restore proper operation.
In addition to visual signs, unusual noises during operation can also signal trouble. If you hear grinding, screeching, or any irregular sounds as the garage door opens or closes, it’s essential to investigate the condition of the cables. Ignoring these symptoms could lead to further issues or even a complete failure of the garage door system, making a timely Garage Door Cable Replacement critical for safe and efficient use.
Common Symptoms and Warning Signs
Identifying issues with garage door cables early can prevent more significant problems. A common symptom is visible fraying or wear on the cables. This damage can lead to potential failure during operation, resulting in unsafe conditions. Another warning sign is a noticeable change in the door’s movement, such as jerking or an inability to lift evenly. Such irregularities often indicate that the cables are no longer functioning effectively, making garage door cable replacement necessary for safety and efficiency.
Regularly inspecting the cables can help catch these problems before they escalate. If you hear unusual noises when opening or closing the door, this could be an indication of cable issues as well. Additionally, if the door suddenly falls or fails to respond to the opener, it is essential to consider garage door cable replacement or professional evaluation. Ensuring the cables are in good condition is crucial for maintaining the overall functionality of your garage door system.
How to Choose a Garage Door Repair Service
When selecting a garage door repair service, it is essential to evaluate their expertise in specific services like Garage Door Cable Replacement. Look for companies that specialize in garage door systems and have technicians trained in both installation and repair. Checking their certification can provide insight into their skills and knowledge. A reliable service provider should also offer a detailed explanation of the replacement process and the type of cables they recommend.
Reading customer reviews and testimonials can further guide your decision. Reviews often reflect the quality of service and reliability of a company. Speak to previous customers if possible, and inquire about their experiences, particularly regarding Garage Door Cable Replacement. This feedback can reveal important aspects such as punctuality, pricing, and overall satisfaction. Prioritizing companies with a solid reputation will help ensure that your garage door is in good hands.
Evaluating Qualifications and Reviews
When evaluating qualifications for a garage door repair service, look for licensed and insured companies. A reputable service provider will possess the necessary certifications that indicate they are qualified to handle tasks such as garage door cable replacement. In addition to licenses, check for industry affiliations that reflect a commitment to ongoing education and best practices. These qualifications can provide peace of mind that the technicians are well-trained and knowledgeable.
Reading customer reviews can offer valuable insights into the reliability and quality of a garage door repair service. Look for feedback specifically related to garage door cable replacement to gauge how well the company addresses this type of issue. A substantial number of positive reviews highlights customer satisfaction, while negative comments can indicate potential red flags. Pay attention to recurring themes in the feedback, as they can reveal strengths and weaknesses in the service provider’s performance.
Maintenance Tips for Garage Door Cables
Regular maintenance of garage door cables can significantly enhance their longevity and reduce the need for costly repairs. Inspect cables periodically for any signs of wear, fraying, or rust. Keeping the cables clean and free from debris can prevent unnecessary strain on the system. Lubricating the cables with appropriate products helps them operate smoothly and reduces friction, which can extend their lifespan.
Being vigilant about the overall condition of your garage door system is essential. If you notice any unusual noises or difficulty in operation, it may indicate a problem with the cables. Prompt attention to these issues can prevent more extensive damage and the need for Garage Door Cable Replacement. Regularly scheduled professional inspections can catch problems early, ensuring that everything functions properly and safely.
How to Extend the Lifespan of Your Cables
Regular maintenance can significantly extend the lifespan of your garage door cables. Inspecting them frequently for signs of wear or fraying is crucial. Ensure that all pulleys and rollers are in good condition and properly lubricated. Using a silicone-based lubricant can help reduce friction and prevent premature wear. Keeping the garage door free of dirt and debris also plays a role in maintaining the integrity of the cables.
In addition to regular inspections, controlling the amount of weight on your garage door can prevent unnecessary strain on the cables. Avoid using the door as a storage area for heavy objects, as this can lead to imbalances and put extra stress on the system. If issues arise, prompt garage door cable replacement is essential to prevent further damage. Taking these preventive measures can help ensure the longevity of your garage door cables.
FAQS
How much does it typically cost to replace garage door cables?
The cost to replace garage door cables usually ranges from $150 to $300, depending on factors such as labor costs and the specific type of cables needed.
What are the signs that indicate I need to replace my garage door cables?
Common signs include frayed or worn cables, a garage door that doesn’t open or close smoothly, unusual noises when operating the door, or visible rust on metal components.
Can I replace garage door cables myself, or should I hire a professional?
While some experienced DIY enthusiasts may replace garage door cables themselves, it’s generally recommended to hire a professional due to the potential dangers and complexities involved.
How long do garage door cables typically last?
Garage door cables can last anywhere from 5 to 10 years, depending on usage, maintenance, and environmental conditions.
Are there maintenance tips to help extend the lifespan of my garage door cables?
Yes, regular visual inspections, lubricating the cables, keeping the garage door clean, and ensuring proper alignment can help extend the lifespan of your garage door cables.
Related Links
Table Of Contents
Common Mistakes to Avoid During Replacement
Improperly identifying the correct type of garage door cable can lead to significant issues during installation, making it crucial to ensure compatibility with your specific garage door system. Many homeowners mistakenly purchase cables that do not match the required specifications, which can result in malfunction or even accidents once the door is in use. Taking time to research the right cables and understanding the weight capacity of your garage door will save time and prevent future headaches during installation.
Another common mistake involves neglecting to release tension from the garage door springs before attempting to replace the cables. Failing to do this can cause the cables to snap with great force, potentially leading to injury or damage to property. Always follow safety protocols and use appropriate tools to safely release any tension before starting the garage door cable replacement in your home. Prioritizing safety and correctness will ensure a smoother replacement process.
Top Errors and How to Prevent Them
One common mistake during garage door cable replacement is failing to disconnect the power supply beforehand. This oversight can lead to accidental electrical shocks or cause the garage door to activate unexpectedly while the cables are being handled. Always ensure that the garage door opener is unplugged and that any backup power sources have been removed before starting the replacement process. Additionally, having all necessary tools and replacement parts ready beforehand can significantly reduce errors and streamline the project.
Another frequent error arises from improper cable tension settings. If the cables are not tensioned correctly, it can lead to uneven door movement or even damage the hardware. To prevent this, carefully follow the manufacturer’s guidelines for tension adjustments. Regularly checking the alignment of the cable pulleys and ensuring they are securely fastened also contributes to a more effective garage door cable replacement in ensuring safe and smooth operation.
When to Seek Professional Help
When considering garage door cable replacement in your home, it’s essential to recognize the limitations of your DIY skills. If you find yourself unsure about any step of the process, seeking professional help can prevent further complications. Issues such as misalignment or improper tension can not only impede the garage door’s functionality but also pose safety risks. An experienced technician will ensure that the cables are installed correctly, minimizing the chance of accidents or damage to your system.
Additionally, if you notice any signs of wear that seem severe, such as fraying or snapping of the cable, it’s wise to consult a professional. These indicators often suggest that the entire garage door mechanism may be under stress. Attempting to replace the cables without the proper knowledge could exacerbate these issues. Expert assistance ensures that all components work harmoniously, providing peace of mind and a reliable garage door system.
Indicators That Require Expert Assistance
There are several indicators that suggest it may be time to seek professional help for garage door cable issues. If you notice frayed or broken cables, the potential for heavy damage increases with each use of the door. Other warning signs include uneven door movement, loud grinding noises, or a door that reverses unexpectedly. These symptoms can indicate serious underlying problems that require the expertise of a professional.
Attempting to handle complex issues related to garage door cables without proper training can lead to more damage or even personal injury. The risk escalates if the door is particularly heavy or if the springs require adjustment during the garage door cable replacement in an improper manner. When safety is at stake, it’s wise to consult with experts who have experience and the right tools for the job.
Maintaining Garage Door Cables for Longevity
Regular maintenance can significantly extend the lifespan of your garage door cables. Inspect the cables frequently for signs of wear, fraying, or any damage. Keeping them clean and free of dirt will also prevent rust and corrosion. Lubricating the cables with a silicone-based spray will help minimize friction during operation. Pay attention to any unusual noises or jerky movements when operating the door, as these can be indicators that the cables require attention.
While DIY maintenance is beneficial, understanding when to seek professional help is also important. If you notice significant signs of wear or if the cables break, prompt action is crucial. Relying on experts ensures that any replacements done, including Garage Door Cable Replacement in your area, are handled safely and efficiently. Professionals can also conduct a thorough inspection of the entire garage door system, identifying potential issues before they become serious problems.
Best Practices for Cable Care
To maintain the longevity of your garage door cables, regular inspection is crucial. Look for signs of wear and tear, such as fraying or rust. If you notice any damage, it may be time for Garage Door Cable Replacement in a timely manner to avoid further complications. Keeping your cables clean and free from debris contributes significantly to their functionality and lifespan.
Lubrication also plays a vital role in cable maintenance. Using a silicone-based lubricant can help reduce friction and wear. Apply lubricant to the cables and surrounding hardware, ensuring that all moving parts operate smoothly. Establishing a routine maintenance schedule will help you catch potential issues early, preventing the need for frequent repairs and Garage Door Cable Replacement in the future.
FAQS
Can I replace a garage door cable myself?
Yes, you can replace a garage door cable yourself if you have the necessary tools and knowledge about garage door mechanics. However, it’s important to follow safety precautions and instructions carefully.
What are the signs that my garage door cable needs to be replaced?
Signs include fraying or wear on the cable, the garage door being unbalanced, or the door not opening or closing smoothly. If you notice any of these issues, it’s advisable to inspect the cables.
How long does it take to replace a garage door cable?
Replacing a garage door cable typically takes about 1 to 2 hours, depending on your skill level and the specific garage door system.
What tools do I need to replace a garage door cable?
You will need a few basic tools such as a socket wrench, pliers, a ladder, and possibly a safety cable or clamps to secure the door while working.
When should I call a professional to replace my garage door cable?
You should consider calling a professional if you’re not comfortable with DIY repairs, if the garage door is severely damaged, or if you notice issues that go beyond just the cables.

Table Of Contents
Step-by-Step Installation Process
Garage Door Installation can be a rewarding home improvement project, but it requires careful planning and execution. Before beginning, gather necessary tools such as a power drill, level, and wrenches. Ensure that you have all the parts from your garage door kit, and read through the supplied instructions thoroughly. Having a helper can make the process easier, especially when handling large panels. Safety should be a priority; wear gloves and goggles to protect yourself during the installation.
Once you are ready to start, begin by removing the old garage door. This may involve detaching the springs, cables, and opener first. After the old door is removed, inspect the area for any damages or debris that needs addressing. Next, assembly begins with the installation of the tracks. Ensure they are level and correctly aligned to facilitate smooth opening and closing. Attention to detail during this stage will set the foundation for a successful installation.
Removing the Old Garage Door
Before beginning any garage door installation, it is essential to safely remove the existing door. Start by disconnecting the door from the opener. This often involves pulling the emergency release cord, allowing manual operation. Make sure to secure the door in the open position to prevent accidents. Remove any hardware, such as springs and tracks, as this can aid in a smoother removal process.
Next, carefully detach the panels from the tracks, ensuring that no sharp edges are exposed during the process. Lifting the panels out of the tracks may require assistance, as they can be heavy. Once all panels are removed, properly dispose of them according to local regulations. Taking these steps will prepare the space for the new garage door installation.
Installing the Garage Door Tracks
Proper installation of the garage door tracks is essential for smooth operation and longevity. Begin by referring to the manufacturer’s instructions for specific measurements and placement guidelines. Typically, tracks are mounted to the walls and ceiling of the garage to provide proper support. Use a level to ensure the tracks are perfectly aligned, as any misalignment can lead to issues with the garage door’s functionality. Secure the tracks with lag screws, ensuring they are tightly fastened to prevent any movement once the garage door is installed.
Once the initial tracks are in place, it’s important to check the alignment again before proceeding further. Slight adjustments may be necessary to achieve the perfect vertical and horizontal orientation. Ensure that the tracks are spaced appropriately to allow for the smooth movement of the door as it opens and closes. After confirming the tracks are level and securely anchored, you can proceed to the next steps of the garage door installation, laying the groundwork for a successful setup.
Leveling and Aligning the Tracks
Once you have installed the tracks for your new garage door, the crucial next step is leveling and aligning them. Take a moment to check that each track is perfectly vertical. Use a level tool for this process. If one side is higher or lower than the other, it can lead to issues when the garage door opens and closes. Adjust the brackets or screws as necessary to achieve the right balance.
After confirming that both tracks are level, focus on aligning them properly. The top of the vertical track should be positioned parallel to the horizontal track. Slight adjustments may be required to ensure that the tracks do not twist. Proper alignment is vital for smooth operation during Garage Door Installation. Once you are satisfied with the positioning, tighten all the brackets securely to maintain the alignment throughout the use of your garage door.
Mounting the Garage Door Panels
Mounting the garage door panels is a crucial step in the garage door installation process. Begin by carefully lifting the first panel into place against the tracks. Ensure that it aligns properly with the vertical tracks on the sides. Use clamps or temporary screws to hold the panel in position. This step is essential for maintaining stability as you continue adding the subsequent panels.
Once the first panel is secure, proceed with the next panel, overlapping it with the top edge of the first panel. Tighten the hinges that connect the panels together. It is important to make sure all panels are aligned and level before fully securing them. This will facilitate smooth operation once the entire garage door installation is complete.
Securing the Panels Together
Once all garage door panels are in their designated positions, the next step involves securing them together. Each panel is typically connected using hinge brackets that allow for smooth movement. Align the panels carefully and fasten the hinges to ensure that they stay firmly attached. This step is crucial, as a secure connection between the panels helps maintain the structural integrity of the door.
After securing the hinges, double-check that all connections are tight and that there are no gaps between the panels. It’s also important to ensure that the panels can move freely without obstruction. Properly completed garage door installation not only enhances the door’s functionality but also contributes to its durability over time. Taking the time to secure each component will lead to a more reliable and efficient garage door system.
FAQS
Is it safe to install a garage door yourself?
Yes, it can be safe to install a garage door yourself if you follow the proper procedures and safety precautions. However, be aware of the potential risks, especially when handling heavy materials and working with springs.
What tools will I need for a DIY garage door installation?
You will typically need tools such as a tape measure, level, drill, screwdriver, hammer, pliers, and possibly a socket set. Refer to your garage door’s installation manual for any additional specific tools required.
How long does it take to install a garage door by yourself?
The time it takes to install a garage door can vary, but on average, it can take anywhere from 4 to 8 hours for someone with basic DIY skills. More complicated installations may take longer.
Can I install any garage door by myself?
While many garage doors are designed for DIY installation, it’s important to check the manufacturer’s instructions. Some models may be more complex and may require professional installation.
What should I do if I run into problems during the installation?
If you encounter issues during the installation, refer to the installation manual for troubleshooting tips. If problems persist, consider consulting a professional garage door installer for assistance.
Related Links


Table Of Contents
Garage Door Materials and Their Prices
The cost of garage doors can vary significantly based on the material chosen. Steel garage doors are often the most economical option, providing durability and low maintenance at a reasonable price. On the other hand, wooden doors offer a classic aesthetic but generally come with a higher price tag due to the cost of materials and the upkeep required to maintain their appearance. Composite doors can provide a balance between durability and aesthetics, often imitating the look of wood while resisting the elements at a somewhat higher cost than steel.
When planning for garage door installation, local labor rates and specific features will also impact the overall cost. Homeowners might search for “Garage Door Installation near me” to find local contractors who provide estimates tailored to their needs. Understanding the various price points for materials can help in making an informed decision that meets both budget and style preferences.
Steel, Wood, and Composite Options
When considering garage door options, steel is often favored for its durability and low maintenance. Steel doors are resistant to weather, dents, and rust, making them a long-lasting investment for homeowners. They come in various styles and colors, offering flexibility in design while typically being more cost-effective than wood. Finding professionals for garage door installation near me may help ensure that the selected steel door is properly fitted for optimal performance.
Wooden garage doors provide an aesthetic appeal that many homeowners desire. Their natural beauty can enhance the overall curb appeal of a home. However, wood requires more maintenance than steel, as it can be susceptible to warping and rotting without regular care. Composite garage doors offer a balance between the two, combining the appearance of wood with enhanced durability. These options are often designed to withstand the elements better than traditional wood doors, making them a smart choice for those seeking a blend of style and resilience.
The Importance of Warranties and Guarantees
When investing in a new garage door, warranties and guarantees play a crucial role in protecting your purchase. They provide assurance that the materials and workmanship meet industry standards. A robust warranty can cover defects that may arise over time, offering peace of mind and potentially saving you from unexpected repair costs.
Homeowners should carefully review the warranty terms before finalizing the installation. Look for coverage details on both the door itself and the hardware used during installation. It’s also wise to seek reputable services by searching “Garage Door Installation near me” to ensure that experienced professionals are handling your project, as this can significantly impact the longevity and performance of your new garage door.
What to Look for in Coverage
When evaluating warranties and guarantees for your new garage door, it’s essential to consider the length and scope of the coverage. Look for options that provide protection against defects in materials and workmanship. A longer warranty generally indicates the manufacturer’s confidence in their product. Ensure that you read the fine print to understand what is included in the coverage, such as limitations and exclusions. This clarity can prevent unexpected expenses in the future.
Another critical aspect is service support. Some warranties offer comprehensive service plans that include installation and maintenance checks. Choosing a garage door company that provides excellent customer service can enhance your overall experience. When searching online for “Garage Door Installation near me,” pay attention to those that highlight their warranty details clearly. This can help you make an informed decision about which supplier to trust with your new garage door.
Permits and Regulations
When considering garage door installation, it’s essential to familiarize yourself with local permits and regulations. Many municipalities require a permit for any significant home improvement project, including the installation of a new garage door. These permits help ensure the work complies with safety codes and zoning laws. Failure to obtain the necessary permits can result in fines or complications during home inspections, potentially delaying the process.
Researching the specific requirements in your area can save you time and headaches. Online resources or local government offices typically provide detailed information about what is necessary for your project. Searching for “Garage Door Installation near me” can also help you find local contractors who understand local regulations. Partnering with knowledgeable professionals ensures compliance and keeps your installation running smoothly from start to finish.
Understanding Local Requirements
When considering a new garage door installation, understanding local requirements is crucial. Building codes and zoning regulations can vary significantly from one municipality to another. These laws may dictate specifics such as the materials you can use, the design of the door, and the dimensions of the installation. Homeowners should always check with local authorities or building departments to ensure compliance before beginning any project.
Permits may be necessary for installation, especially if structural changes are involved. This process can add time and cost to your project but is essential for ensuring safety and legality. Engaging a reputable contractor who understands the local landscape can simplify this process. Searching for “Garage Door Installation near me” can connect you with professionals familiar with the requirements in your area, making the process smoother.
FAQS
What is the average cost of having a new garage door fitted?
The average cost can range from $600 to $2,500, depending on the type of door, materials used, and installation fees.
How do the materials of a garage door affect the overall cost?
Different materials have varying costs; for example, steel doors are generally more affordable than wood doors, while composite options may fall somewhere in between.
Are there additional costs to consider beyond the price of the garage door itself?
Yes, additional costs can include installation fees, permits, and any necessary modifications to your garage or existing door frame.
What warranties or guarantees should I look for when purchasing a garage door?
Look for warranties that cover both the door and the installation, typically ranging from 1 to 10 years, and ensure they cover defects, materials, and workmanship.
Do I need a permit to install a new garage door?
It depends on your local regulations; some areas require permits for garage door installation, so it’s important to check with your local building department before proceeding.

Table Of Contents
DIY Garage Door Installation
Many homeowners consider DIY garage door installation as a way to save money. This option allows individuals to avoid labor costs associated with hiring professionals. However, installing a garage door requires careful planning and adequate knowledge of the entire process. Mistakes made during installation can lead to safety hazards or costly repairs down the road.
Garage door installation in residential settings typically involves multiple steps, including measuring the space, assembling the door, and installing the necessary hardware. Having the right tools is essential to this process. Those who attempt a DIY installation should confidently assess their skills and be prepared for a time-consuming project. Weighing the pros and cons can help determine if a DIY approach is the best choice for your situation.
Tools and Skills Required
Successfully undertaking garage door installation in your home requires a specific set of tools and skills. Essential tools include a power drill, screwdrivers, a level, tape measure, and a ladder. Safety goggles and gloves are also necessary to ensure protection during the installation process. Having access to a torque wrench may be beneficial for securing the door’s hardware. Each tool serves a distinct purpose, making it important to be prepared before starting the project.
In addition to the right tools, possessing certain skills can significantly impact the installation process. Basic carpentry skills and a general understanding of mechanics are advantageous. It helps to have experience working with power tools and a familiarity with building codes, especially if your garage door installation in a residential area must meet specific regulations. Attention to detail and the ability to follow instructions closely will also contribute to a successful outcome.
Seasonal Trends in Garage Door Installation Pricing
Garage Door Installation in any region can exhibit noticeable seasonal trends that influence pricing. Typically, spring and fall emerge as peak seasons for installations. Homeowners often prefer these times for upgrades, leading to higher demand. Contractors may raise prices in response to this influx of business, making it essential to strategize timing for optimal cost savings.
On the other hand, winter and summer may present opportunities for lower prices. During colder months, demand tends to dip, prompting contractors to offer discounts to attract business. Conversely, summer can also be competitive, with promotions enticing homeowners to consider installation during these warmer months. Understanding these seasonal fluctuations allows consumers to make informed decisions on when to schedule their Garage Door Installation in order to maximize their budget.
Best Times to Install for Cost Savings
The best time for garage door installation can significantly impact overall costs. Many homeowners find that scheduling the work during the fall or spring months leads to savings. These seasons are often less busy for contractors, resulting in potential discounts and better availability. Homeowners may also avoid the peak demand periods, which typically fall during summer and winter when extreme temperatures prompt more urgent installations.
Additionally, timing your garage door installation around sales events or promotions can enhance cost-effectiveness. Retailers often offer discounts during holiday weekends such as Memorial Day or Labor Day. Keeping an eye out for local discounts can make a substantial difference in budget realization. Engaging in garage door installation in these strategic timeframes not only ensures a smoother process but may also free up funds for other home improvement projects.
The Role of Garage Door Features in Pricing
The features of a garage door significantly impact its overall price, with various enhancements leading to different cost brackets. Standard models may offer basic functionality and aesthetics, while doors equipped with premium materials, insulation, and designs can command a higher price. Garage door installation in homes often incorporates choices about windows, decorative hardware, and automated systems, all of which add to the investment required.
Insulation is a critical aspect often overlooked in cost considerations. A well-insulated garage door can provide energy efficiency benefits, especially in climates with extreme temperatures. Consequently, while the initial expense may be higher, the long-term savings on heating and cooling bills can justify the increased outlay. Custom designs, tailored to fit unique architectural styles, can also elevate installation costs, reflecting both the craftsmanship involved and the rarity of the design itself.
Insulation, Windows, and Custom Designs
Insulation is an important feature to consider when planning for garage door installation in homes. Insulated garage doors provide better energy efficiency, helping to regulate the temperature inside the garage, which can ultimately affect the overall energy costs of the home. This enhancement is particularly valuable in areas with extreme climates, where heating or cooling the garage can make a significant difference in comfort and electricity bills.
Windows can also impact both the aesthetics and functionality of a garage door. They can allow natural light to enter the space while providing a level of security and insulation. Custom designs offer homeowners the chance to tailor the look of their garage door to fit their personal taste and the architectural style of their home. These features often lead to an increase in the overall cost of garage door installation in comparison to standard models.
FAQS
What is the average cost to install a garage door?
The average cost of installing a garage door typically ranges from $800 to $2,500, depending on factors such as the type of door, materials, and labor costs.
Is it cheaper to install a garage door myself?
While DIY garage door installation can save on labor costs, it requires specific tools and skills. If you’re not experienced, it may lead to additional expenses for corrections or safety issues.
What tools do I need to install a garage door?
Essential tools for garage door installation include a power drill, level, measuring tape, wrenches, pliers, and possibly a stud finder, depending on your specific garage setup.
When is the best time to install a garage door for cost savings?
The best times for cost savings on garage door installation are typically during the off-season months, such as late fall or winter, when demand is lower and some contractors may offer discounts.
How do garage door features affect installation costs?
Features like insulation, windows, and custom designs can significantly affect the overall cost of the garage door installation. More complex features typically lead to higher prices due to additional materials and labor.
Related Links
Table Of Contents
Comparing Lowe’s with Competitors
Lowe’s offers competitive pricing for garage door installation when compared to other home improvement retailers. They often provide a range of options, including budget-friendly models and higher-end products. While Lowe’s may charge a flat fee for standard installations, additional costs can arise for custom installations or specific upgrades. This pricing structure allows customers to choose based on their needs while remaining within their budget.
In contrast, competitors like Home Depot and local contractors might present installation fees that fluctuate based on regional labor costs and material choices. Some may include a free installation with the purchase of a garage door, making their overall offering quite appealing. Evaluating the total cost of garage door installation, including additional services or warranties, can help shoppers make an informed decision on where to purchase and install their new doors.
Pricing Variations Across Home Improvement Stores
Home improvement stores offer a wide range of pricing options for garage door installation, with each retailer setting their rates based on factors such as brand partnerships and regional market demand. Lowe’s typically provides competitive pricing compared to other large chains like Home Depot or Menards, but variances can be observed based on specific garage door models and additional services offered. Customers should consider not only the upfront cost of installation but also any potential fees for extra features such as smart technology or insulation.
Pricing can also be influenced by installation complexity and local labor rates. Some stores may have promotional offers that could make garage door installation more affordable at certain times of the year. Additionally, bundling services or purchasing additional products may lead to discounts. It is advisable for customers to compare quotes from multiple sources to find the best deal that suits their specific needs.
Customer Reviews and Feedback
Many customers express satisfaction with their Garage Door Installation experiences at Lowe’s. The process often starts with a consultation, allowing homeowners to assess their options and receive expert advice. Many reviews highlight the professionalism of the installation teams, noting that they arrived on time and completed the job efficiently. Customers appreciate the attention to detail and the quality of the products used during the installation.
However, some feedback indicates inconsistencies in the communication from customer service. A few customers reported difficulties in scheduling appointments and receiving timely updates about their Garage Door Installation. While most installations proceeded smoothly, these experiences suggest that potential customers should be diligent in confirming their appointment details and ensuring clear communication with Lowe’s representatives.
Insights on Installation Experiences
Customer experiences with garage door installation at Lowe’s vary widely. Many customers appreciate the professionalism of the installers and the efficiency with which the job is completed. Common feedback highlights the installers’ knowledge of different garage door models and their ability to navigate unexpected challenges. However, some customers report issues with scheduling and communication, particularly regarding changes in installation dates.
Managing expectations is crucial for a smooth garage door installation process. Customers often stress the importance of being prepared ahead of the installation date. Clearing the space around the garage and ensuring easy access for the installers can significantly enhance the experience. Many recommend discussing any specific needs or concerns with the installation team beforehand to ensure a seamless process.
Steps to Prepare for Installation
Preparing your home for garage door installation requires careful attention to space and access. First, clear the area around the garage door to allow easy movement for installers and equipment. Remove any obstacles such as vehicles, furniture, or landscaping that could impede the installation process. This not only ensures safety but also makes the job go more smoothly. Additionally, it’s important to ensure that the garage is secure and that the existing door, if any, is properly detached before the scheduled installation.
Checking the garage’s structural integrity is another crucial step in the preparation process. Make sure that the frame, walls, and ceiling are in good condition to support the new door. Any damage should be addressed prior to the garage door installation to prevent complications. It’s recommended to have an adequate power source available if the new door includes automatic features. Properly preparing the garage can lead to a more efficient installation and a longer-lasting door.
Space and Access Considerations
When preparing for garage door installation, it’s essential to consider the available space around the existing door. Adequate clearance allows technicians to work efficiently without obstructions. This space should be free of clutter, such as tools or vehicles, which can hinder the installation process. Ensuring that there’s enough room to maneuver will contribute to a smoother and faster installation experience.
Access to your garage is another crucial factor in the installation process. If the garage entrance is narrow or difficult to navigate, it may pose challenges for the installation team. Clear pathways from the driveway or street to the garage can prevent delays and ensure that the necessary equipment is transported easily. Taking the time to address these access issues will help facilitate a more seamless garage door installation.
FAQS
How much does Lowe’s typically charge for garage door installation?
Lowe’s garage door installation costs generally range between $200 to $500, depending on the complexity of the installation and the type of door chosen.
Are there additional fees involved in Lowe’s garage door installation?
Yes, additional fees may apply for extra services such as removing an old garage door, making modifications for fit, or if additional materials are needed during the installation.
Does Lowe’s offer any warranties on garage door installations?
Yes, Lowe’s typically offers a warranty on both the garage door and the installation service, but the specifics can vary, so it’s best to check with your local store for details.
Can I schedule an installation appointment online with Lowe’s?
Yes, you can schedule an installation appointment online through the Lowe’s website or by contacting your local store directly.
What should I do to prepare for my garage door installation?
To prepare for installation, ensure the area is clear of debris and obstacles, provide access to electrical outlets if necessary, and discuss any specific needs with the installation team prior to their arrival.

Table Of Contents
Common Issues with Garage Door Springs
Garage door springs are crucial components that enable smooth operation. Over time, wear and tear can lead to several common issues, including noisy operation, difficulty opening or closing the door, and noticeable gaps when the door is closed. These problems can signal that the springs are losing tension or failing altogether, causing inconvenience and safety concerns.
Homeowners often overlook the condition of their garage door springs until they experience issues. Regular maintenance can help identify potential problems early and prevent complete failure. When issues arise, searching for “Garage Door Spring Replacement near me” can connect you with local professionals who can quickly address the situation and restore your garage door’s functionality.
Signs Your Spring Needs Replacement
One of the most evident signs that your garage door spring needs replacement is if the door does not open or close smoothly. You may notice that it struggles to lift or makes unusual noises during operation. A spring that is worn out or damaged can cause your door to become unbalanced, leading to further complications if not addressed promptly. If you find yourself repeatedly wrestling with a stubborn door, it’s time to look into options for garage door spring replacement near me.
Another indication that your spring may be reaching the end of its lifespan is if it appears to be stretched or has visible gaps. Springs that are frayed or show significant rust should be replaced as they can affect the safety and functionality of your garage door. Regular inspections can help you catch these issues early. If you see these warning signs, searching for a reliable service for garage door spring replacement near me can save you from more extensive repairs down the road.
Lifespan of Garage Door Springs
Garage door springs typically have a lifespan measured in cycles, with one cycle representing a complete opening and closing of the garage door. Standard torsion springs can last anywhere between 7,000 to 15,000 cycles, depending on their quality and the frequency of use. If you’re using your garage door multiple times a day, the lifespan may shorten significantly. Homeowners should keep in mind that regularly maintaining these springs can help extend their usability.
As springs age, they might show signs of wear, making it critical to monitor their condition. If you notice unusual noises or difficulty in opening and closing the door, it might be time to look into a garage door spring replacement near me. Understanding the expected lifespan of your specific garage door springs can also guide your decisions on replacements and routine maintenance. Keeping track of the cycles can save you time and money in the long run.
How Many Cycles Should You Expect?
Garage door springs are designed to endure a specific number of cycles, with one cycle representing a complete open and close of the door. Generally, standard residential springs last about 10,000 cycles. Heavy-duty springs can last for around 15,000 to 20,000 cycles. The lifespan can vary depending on factors such as usage frequency, door weight, and the quality of the springs, making it crucial to understand when a replacement may be necessary.
When considering garage door spring replacement, investigate options for garage door spring replacement near me to ensure you find quality services nearby. Regular maintenance can also help extend the life of your springs, but be mindful of signs indicating they are reaching the end of their lifespan. Knowing the expected number of cycles can aid in budgeting for future repairs and maintaining the functionality of your garage door system.
Safety Precautions When Replacing Garage Door Springs
Replacing garage door springs requires strict adherence to safety precautions. Always wear appropriate safety gear, including goggles and gloves. These springs are under high tension and can cause serious injury if mishandled. Secure the garage door in the open position with locking pliers to prevent it from falling while you work. Ensure that the area is clear of obstacles and distractions to maintain focus on the task at hand.
Additionally, familiarizing yourself with the specific type of spring you are replacing is crucial. Before starting, consult the manufacturer’s instructions or online resources related to “Garage Door Spring Replacement near me,” as local guidelines may provide insights tailored to your community’s regulations. Having the right tools on hand, such as a winding bar and a socket set, will enhance safety and efficiency during the replacement process.
Tools Needed for a Safe Replacement
When preparing for a garage door spring replacement, having the right tools on hand is essential for a safe and effective process. The basic toolkit should include a winding bar, a ratchet wrench with appropriate sockets, and pliers. Additionally, a sturdy ladder may be necessary to reach the garage door spring assembly. Safety glasses and gloves are also recommended to protect yourself from potential injuries. Being well-equipped will streamline the replacement process and minimize risks.
Other tools that may be helpful include a torque wrench, which allows for precise adjustments, and a safety cable to prevent the spring from causing damage if it breaks. It’s also wise to have a helper present, especially if you’re unfamiliar with DIY repairs. If you’re uncertain about the procedure or feel uncomfortable at any point, consider searching for “Garage Door Spring Replacement near me” to find professional services in your area. This can provide peace of mind and ensure the job is done correctly.
FAQS
What are the different types of garage door springs?
The two main types of garage door springs are torsion springs and extension springs. Torsion springs are mounted above the door and are used for heavier doors, while extension springs are located on either side of the door and are typically used for lighter doors.
How can I tell if my garage door spring is broken?
Signs of a broken garage door spring may include the door not opening or closing completely, an audible noise when operating the door, or the door appearing uneven or sagging. If you notice these issues, it’s advisable to inspect the springs.
How do I determine the right size spring for my garage door?
To find the correct size spring, measure the existing spring’s length and diameter, as well as the weight of your garage door. You can consult with a garage door specialist or refer to manufacturer specifications to ensure you select the appropriate replacement.
Is it safe to replace a garage door spring myself?
Replacing garage door springs can be dangerous due to the high tension they are under. It’s recommended to follow safety precautions and use the correct tools, or to hire a professional if you are not experienced with this kind of repair.
How often should I replace my garage door springs?
The lifespan of garage door springs can vary, but they typically last between 7 to 15 years, depending on usage. If you notice any signs of wear or if the springs have reached their cycle limit, it’s time to consider a replacement.


Table Of Contents
Choosing the Right Replacement Spring
Selecting the right replacement spring is crucial for the proper functioning of your garage door. Different types of springs serve specific door weights and sizes. Torsion springs typically provide more lifting power and have a longer lifespan, while extension springs are often easier to install. Knowing the specifications of your existing spring will guide you in finding the best match, ensuring smooth operation.
When considering Garage Door Spring Replacement, it is also important to factor in the material and quality of the spring. High-strength steel springs are known for durability and longevity. Evaluating the load rating will help in choosing a spring that can handle your door’s weight effectively. Always opt for quality over price to avoid frequent replacements and ensure safety in your garage door’s operation.
Factors to Consider When Selecting a Spring
When selecting the right spring for a garage door spring replacement, it is essential to consider the weight and type of the door. Different garage doors, such as single or double doors, can vary significantly in weight. Understanding the door’s specifications will help you choose a spring that can handle the load safely and effectively.
Another factor to take into account is the spring’s lifespan and cycle rating. Springs are typically rated based on the number of cycles they can perform before wearing out. A higher cycle rating indicates a longer-lasting spring, which may be more cost-effective in the long run. Investing in a quality spring not only ensures reliable performance but also contributes to the overall safety of your garage door system.
How to Properly Remove the Old Spring
Removing an old garage door spring requires careful preparation and attention to safety. First, ensure the garage door is fully closed and unplug the opener. This step prevents any accidental operation during the process. Secure the door in place with clamps or locking pliers to prevent it from moving. Wearing safety goggles and gloves is essential to protect yourself from potential injuries caused by broken springs.
Once safety measures are in place, begin by loosening the tension on the spring. Use a winding bar to carefully unwind the spring, following the manufacturer’s instructions for tension release. After relieving the tension, detach the spring from its mounting brackets. Always be cautious of the sudden movement that can occur when releasing a spring’s tension. Properly handling this stage is crucial to ensure a safe garage door spring replacement.
Techniques for Safe Removal
Removing an old garage door spring requires careful preparation and attention to safety. Start by disconnecting the garage door opener and securing the door in a closed position. It’s essential to wear safety goggles and gloves to protect yourself from any potential injuries during the process. Apply clamps or locking pliers to the track just below the bottom roller to keep the door securely in place while you work. The high tension in garage door springs can lead to severe injuries if not handled correctly, emphasizing the need for cautious handling.
Once the door is secured, begin the removal process by loosening the hardware that holds the spring in place. If dealing with torsion springs, use a winding bar to carefully unwind the spring. This task can be especially dangerous, as releasing the tension abruptly can cause the spring to snap back. Always ensure that you are positioned in a safe area away from the path of the spring. Following these techniques for safe removal is crucial before proceeding with Garage Door Spring Replacement, ensuring your safety and facilitating a smoother installation process.
Installing the New Garage Door Spring
Careful installation of the new garage door spring is crucial for safe and efficient operation. Begin by ensuring that the spring is properly affixed to the brackets on both sides of the garage door. Align the spring accurately with the torsion shaft if you’re using a torsion spring. It’s essential to use the correct hardware, including the appropriate sized nuts and bolts, to secure the spring firmly in place. Take time to inspect all connections, ensuring that nothing is loose or misaligned, as this could affect the functionality of the door.
Once the new spring is installed, perform a series of tests to ensure everything is functioning correctly. Manually lift and lower the garage door to check for smooth operation. If any resistance or unusual noises occur, it may indicate that adjustments are needed. By taking these steps seriously during your garage door spring replacement, you can help ensure the longevity and safety of the door’s operation. Always remember to consult manufacturer instructions or seek professional advice if at any point you feel unsure during this process.
Installation Steps You Should Follow
Begin by ensuring all safety precautions are taken. Wear safety goggles and gloves to protect yourself during the process. Starting with the garage door in its closed position, disconnect the power supply to prevent any accidental opening. Gently unwind the torsion spring using a winding bar, ensuring it is fully unwound before attempting to remove it. Follow this by detaching the spring from the brackets on either side of the door.
Next, take the new garage door spring and securely attach it to the mounting brackets. Carefully wind the spring according to the manufacturer’s specifications, making sure to maintain the correct tension. Ensure both ends of the spring are well-positioned in the drum if you are replacing torsion springs. Complete the process by reconnecting the power supply to the opener and testing the door’s operation to confirm a successful garage door spring replacement.
FAQS
Can I replace a garage door spring myself?
Yes, you can replace a garage door spring yourself if you have the right tools, knowledge, and safety precautions in place. However, due to the potential dangers involved, many people choose to hire a professional.
What types of garage door springs are there?
There are two main types of garage door springs: torsion springs and extension springs. Torsion springs are located above the door, while extension springs are found on either side of the door.
What safety measures should I take when replacing a garage door spring?
Always wear safety goggles and gloves, ensure the garage door is in the closed position, and use proper tools. If you’re unfamiliar with the process, consider seeking help from a professional.
How can I tell if my garage door spring needs replacement?
Signs that your garage door spring may need replacement include difficulty opening or closing the door, visible damage or deformation of the spring, and a noisy operation when using the door.
What tools do I need to replace a garage door spring?
Common tools needed for replacing a garage door spring include a socket wrench, winding bars, pliers, and a ladder. Safety equipment, such as gloves and goggles, is also essential.